So much has happened so far this year since my last post on the 1st to get you all caught up on! I went to the TNNA trade show on the weekend of the 10th and it was a fabulous show where I got to hang out with my friends at Needlepoint Now and many others who I only get to see at these shows. Unfortunately, I came home with more than just fond memories, I picked up the flu as well! As bad as it was to spend the next week sick, I was more upset that I had broken a multi-year run of perfect health. I have not even caught a cold since 2008, can you believe it? I'm finally feeling a little better and have some stitching progress to show you.
Over the holidays I finally had a chance to get started stitching Mod Ornaments, the Sandra Arthur Mystery class that started last November. Now that I'm actually stitching it, I can really appreciate all that Sandy has done with the design. She offers you many, many options to personalize your canvas as you see fit, especially as it comes to one's preferred level of sparkle and bling! I am definitely a more is better sort of person, so I took every option to add even more shine!
Here is my canvas so far, 95% done with Lessons 1 & 2, four ornaments are stitched as are the green beads:

For the pink ornament, Sandy had found the most perfect shade of pink seed bead for the body of the ornament-- it's gorgeous! I changed it up a bit with my center band though, I only did two of the colors with the Herringbone stitch and filled in the orange area with cross stitches.
For the orange ornament, I again took one of Sandy's options and stitched the body of the ornament in a mixture of silk and metallic rather than in the solid silk. I also added more of those great pink seed beads to the pink bands. I put green sequins behind the beads that dot the center band.

When it came time to add the Swarovski Margarita flowers to the green beads, I was surprised to find I didn't have the correct size crystal on hand! I kind of look at these items as "staples" so it was kind of like going to the pantry and not finding any flour! However, I did have them in the right size in Peridot Green AB oddly enough and so I used those:
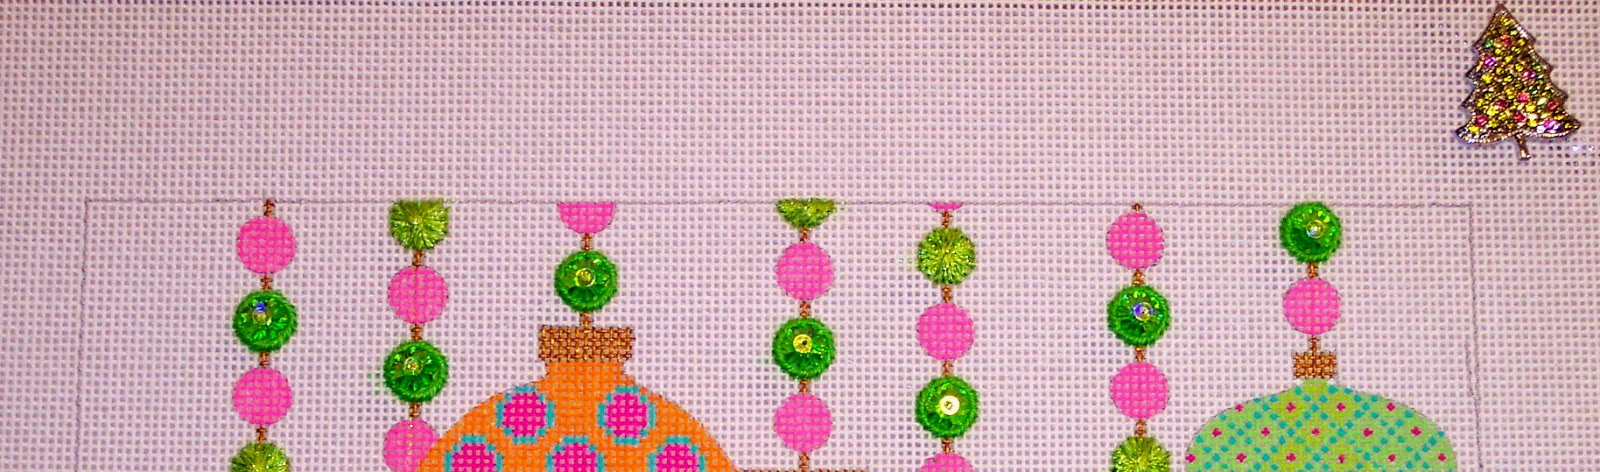
Now I've mentioned I'm a "more is better" type, so I attached my crystals with a matching bead AND a 2.5mm green holographic sequin on top! Yes, it did make it even more sparkly!

For the big pink ornament, I actually used less bling than Sandy did, she has Swarovski Crystal sequins on her center medallions, I used some too but mine are smaller, I set them in the center of these great green leaf-shaped sequins. The little blue dots are also pearlized finish sequins attached with beads.

For the little ornament in the corner, I again went with the "more sparkle" option by using one of the newest colors of FyreWerks for the smaller cross stitches. Also, I thought the beads didn't stand out enough on their own, so I put these tiny 2mm flower shaped sequins behind them, definitely giving them more prescence without being too much.

So now I'm on to the next Lesson, where we will be adding a Peyote stitched band to the big center ornament. Sandy showed me a photo when we were at Market and I can tell you it is FABULOUS! Here is a photo of my three colors of Delica beads, as well as the rest of my Margarita beads that I still need to attach:

That's all for now, I'll be back next week with some new finishing photos!
Woman, you have gone wild!
ReplyDeleteLove it!!! Your additions are fabulpous and perfect!!!
ReplyDeleteSuch beautiful work!
ReplyDelete